Hey, it’s Ethan Bellweather. For years, I’ve been totally hooked on how we experience buildings. Not just living and working in them, but how we see them, you know? Ever since my days at SOM, and now with my own studio, Bellweather Design, I’ve been convinced that a killer photograph can unlock a building’s soul. It’s way more than just documentation; it’s pure storytelling. It’s about taking a three-dimensional experience and turning it into a two-dimensional image that just grabs you.
Architectural photography? It’s not just pointing and shooting. It’s about understanding the design, the light, the whole vibe. It’s about translating the architect’s vision so everyone else can get it. And the cool thing is, it’s a skill you can learn. Seriously.
Level Up Your Architectural Photography: Gear, Composition, and Light
Ready to dive in? Let’s break down the key elements that will elevate your architectural photography from snapshots to stunning visual narratives. We’ll cover everything from essential equipment to mastering composition and harnessing the power of light and shadow.
First, The Arsenal: Essential Gear for Architectural Photography
Let’s talk tools. You don’t need to empty your bank account to start, but the right gear definitely helps. Here’s my take on the essentials:
- Camera: A DSLR or mirrorless camera with interchangeable lenses is the sweet spot. Full-frame sensors give you the best image quality, but crop sensors are totally fine when you’re starting out.
- Lenses: Okay, this is where it gets interesting.
- Wide-Angle Lens (16-35mm): Absolutely essential for capturing a building’s full form and its surroundings. It lets you work even when space is tight.
- Standard Zoom Lens (24-70mm): Super versatile for snagging details and those contextual shots that tie everything together.
- Tilt-Shift Lens: Okay, this is the holy grail for architectural photographers. It lets you fix perspective distortion and control the plane of focus like a boss. It’s an investment, sure, but totally worth it if you’re serious.

- Tripod: Non-negotiable. Absolutely crucial for sharp images, especially when the light’s low or you’re using long exposures. Trust me on this one.
- Remote Shutter Release: This little guy minimizes camera shake when you’re on a tripod. A must-have.
- Level: Make sure your camera is perfectly level. It prevents those wonky perspective distortions that drive everyone crazy.
Don’t stress about having the “best” equipment right away. Start with what you’ve got and upgrade as you go. The most important thing? Knowing how your gear works and using it like a pro.
Composing the Shot: Building Blocks of a Great Image
Composition is everything. It’s how you arrange the elements within the frame to create a picture that’s not just visually appealing, but also tells a story. Here are some key principles to keep in your back pocket:
- Lines: Keep an eye out for leading lines, vertical lines, and horizontal lines. Use them to draw the viewer’s eye through the image and create a sense of depth and perspective.
- Shapes: Architecture is all about geometry. Recognize the shapes within the building and use them to create interesting compositions. How do different shapes play off each other?
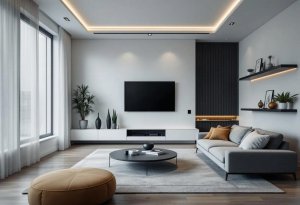
- Symmetry: Buildings often have symmetry, which you can use to create balanced, harmonious images. Emphasize the symmetry, or create contrast by intentionally breaking it.
- Rule of Thirds: This is a classic. Imagine dividing your frame into nine equal parts. Place key elements along those lines or where they intersect to create a more dynamic composition.
- Figure-Ground Relationship: How does the building relate to its background? Make sure your subject stands out clearly.
Experiment with different compositions. Find what clicks with you. Don’t be afraid to break the rules, but make sure you understand them first.
The Soul of the Image: Painting with Light and Shadow
Light is everything in photography. It shapes the form, reveals the texture, and sets the mood. Understanding light is essential for capturing architectural images that truly sing.
- Natural Light:
- Golden Hour: That hour after sunrise and before sunset? Pure magic. It gives you warm, soft light that makes buildings look incredible.
- Blue Hour: The hour after sunset and before sunrise. Cool, even light that’s perfect for capturing cityscapes.
- Overcast Days: Don’t write them off! Overcast days give you soft, diffused light that minimizes harsh shadows and reveals subtle details.
- Artificial Light:
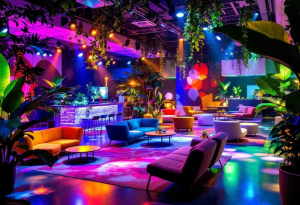
- Interior Lighting: Use it to create warmth and atmosphere. Pay attention to color temperature and how it balances with natural light.
- Streetlights: These can add a dramatic touch to nighttime shots. Experiment with angles and exposures to see what you can create.
Pay attention to how light interacts with the building’s surfaces. Look for highlights, shadows, and reflections. Use light to emphasize form and texture. Think about the weather – a cloudy day softens harsh lines, while a sunny day creates dramatic shadows.
Finding the Perfect Angle: Perspective and Viewpoint
The angle you choose can dramatically change how a building is perceived. Play around with different viewpoints to find the most compelling perspective.
- Eye Level: A natural, realistic perspective.
- Low Angle: Makes a building look taller and more imposing.
- High Angle: Gives you a broader view of the building and its surroundings.
- Worm’s-Eye View: Looking straight up from a very low angle creates a dramatic, abstract perspective.
- Bird’s-Eye View: Aerial photography (drones!) offers a unique perspective on architectural form and urban context.
Think about the building’s design and how it relates to its surroundings when you’re choosing a viewpoint. Find vantage points that showcase its unique features and spatial qualities.
The Digital Darkroom: Post-Processing to Refine Your Vision
Post-processing is a key part of the workflow. It’s where you refine your images and unlock their full potential. Here are a few key adjustments to consider:
- Exposure: Adjust the overall brightness.
- Contrast: Increase it for a punchier image, or decrease it to soften the tones.
- Highlights and Shadows: Bring out details in those areas.
- White Balance: Correct the color temperature for accurate colors.
- Perspective Correction: Straighten lines and fix distortion.
- Sharpening: Enhance details.
- Noise Reduction: Clean up noise, especially in low-light shots.
Use post-processing to enhance your images, but don’t go overboard. The goal is a realistic and compelling representation of the architecture, not a heavily manipulated image.
Sky High: Drone Photography for Unprecedented Views
Drones have changed the game. They give you aerial views of buildings and their surroundings, revealing their form and context in a totally new way.
Final Thoughts: Keep Exploring, Keep Creating
Architectural photography is a journey, not a destination. The more you practice, the better you’ll get. Try new things, break the rules, and develop your own unique style. Get out there, explore the built environment, and capture the essence of design. And most importantly? Have fun!


